Garis besar topik
-
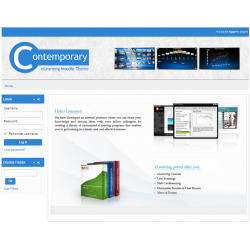
A learning management system is a software application designed to administer, document, track, report, and deliver educational courses, training programs, or learning and development initiatives. It serves as a centralized hub where lessons, assignments, resources, feedback, and communication converge, functioning like a digital classroom for students or employees. LMSs support both asynchronous learning (self-paced courses) and synchronous learning (live sessions), and they often include tools for classroom management, progress monitoring, and analytics
-
Siswa harusTandai selesai
LMS adalah sistem perangkat lunak (software) yang memungkinkan penyampaian materi pelatihan, penilaian, diskusi, dan sertifikasi secara terpusat dan terstruktur. Dengan LMS, pembelajaran dapat diakses kapan saja dan di mana saja, sehingga mendukung model pembelajaran fleksibel dan berkelanjutan (continuous learning).
Beberapa Contoh LMS Populer
LMS Keterangan Moodle Open-source, populer di institusi pendidikan Google Classroom Ringan dan mudah digunakan oleh sekolah/kampus TalentLMS Cocok untuk pelatihan perusahaan dan integrasi dengan sistem HR SAP Litmos LMS enterprise untuk training berbasis skill dan compliance Mekari Talenta LMS Modul pelatihan berbasis cloud yang terintegrasi dengan sistem aplikasi HRD Edmodo, Canvas, Coursera for Business Untuk pendidikan atau pembelajaran skala besar
-
-
SITE CONFIGURATION Advanced Features There are features in your Moodle site that really extend the functionality of your Moodle, but are not considered plugin based. These advanced features can be enabled or disabled as needed. There are quite a few features that you have to choose from, so to make things easy, we have highlighted just a couple of key advanced features that are commonly enabled. Outcomes: These are goals you can set up in a course and attach to learning activities, to help evaluate a learnerΓÇÖs competency in a subject. Web Services: When enabled, these can be used to connect Moodle with other applications. Completion Tracking: If you choose to enable this setting, you can track the criteria for courses, and the activities within those courses. Note that once Completion Tracking is enabled in ΓÇ£Ad vanced FeaturesΓÇ¥, it then needs to be enabled in the ΓÇ£Course SettingsΓÇ¥ Conditional Access: Here you can restrict the access users have to the learning resources and activities within a course, based on their different qualifications such as grades, completion status (of other activities), profile fields, and groups they belong to. Users User accounts are the profiles created for the learners in the Moodle site, that require the person to login to his or her account using a username and password. There are quite a few different ways to create users. Once the accounts are created, users can then begin enrolling in courses. Registration, Authentication, and Enrollment For the sake of simplicity, we will break registration into 3 main categories: User based, Manager or Administrator based, and Automated. Keep in mind that you do not have to pick one in isolation. You can use a combination of multiple authentication methods if you wish.
-
-
Modul administrasi Moodle 3.3 mencakup berbagai fitur manajemen sistem pembelajaran (LMS) berbasis web, yang dirancang untuk mendukung pengajaran dan penilaian. Sebagai platform open-source, Moodle 3.3 menyediakan fitur lengkap untuk administrator, guru, dan pengguna.Berikut adalah poin-poin kunci dalam modul administrasi Moodle 3.3:Utama Site Administration (Administrasi Situs)
Menu utama untuk administrator mencakup:- Users (Pengguna): Mengelola akun pengguna, autentikasi, dan izin.
- Courses (Kursus): Membuat dan mengelola kursus baru.
- Grades (Nilai): Mengatur sistem penilaian.
- Plugins: Memasang dan mengelola modul tambahan.
- Appearance (Tampilan): Mengubah tema dan tata letak situs
- Server: Pengatur
- Integrasi Tool: Peningkatan dukungan LTI (Learning Tools Interoperability).
- Manajemen Dokumen: Perbaikan pada penanganan file dan dokumen.
- Peningkatan User Experience: Navigasi dan antarmuka yang lebih intuitif.
- Login Admin: Masuk menggunakan kredensial administrator melalui browser.
- Menambah User: Melalui Site Administration > Users > Add new user.
- Membuat Kursus: Melalui Site Administration > Courses > Add a new course.
- Backup/Restore: Fitur untuk mencadangkan konten kursus.
-
Instal Plugin Melalui Antarmuka Moodle
Moodle menyediakan opsi instalasi langsung melalui antarmuka admin. Berikut langkahnya:
- Login sebagai administrator.
- Buka Site Administration > Plugins > Install plugins.
- Klik tombol Choose a file, lalu unggah file ZIP plugin yang sudah diunduh.
- Klik Install plugin from ZIP file.
- Moodle akan memeriksa kompatibilitas plugin. Jika tidak ada masalah, lanjutkan dengan mengklik Continue.
Instal Plugin Secara Manual (Alternatif)
Jika unggahan melalui antarmuka tidak berhasil, Anda dapat menginstalnya secara manual:
1. Ekstrak file ZIP plugin di komputer Anda.
2. Pindahkan folder plugin yang telah diekstrak ke direktori Moodle di server Anda. Biasanya, direktori ini berada di:
/home/username/public_html/mod/ untuk plugin aktivitas.
/home/username/public_html/theme/ untuk plugin tema.
3. Setelah memindahkan file, login ke Moodle sebagai administrator. Moodle akan mendeteksi plugin baru secara otomatis dan meminta Anda untuk mengonfirmasi instalasi.
Selesaikan Instalasi
Setelah plugin berhasil diunggah, Anda akan diarahkan ke halaman instalasi. Ikuti langkah-langkah berikut:
- Moodle akan memeriksa dependensi plugin. Jika ada masalah, perbaiki sebelum melanjutkan.
- Klik Upgrade Moodle database now untuk menyelesaikan instalasi.
Konfigurasi Plugin
Setelah instalasi selesai, beberapa plugin memerlukan konfigurasi tambahan. Ikuti panduan yang tersedia di halaman plugin atau dokumentasi resminya.
Tips untuk Instalasi Plugin Moodle yang Sukses dan Aman
Untuk memastikan instalasi plugin berjalan lancar, berikut beberapa tips tambahan:
1. Backup Sebelum Instalasi: Selalu buat cadangan situs Moodle Anda sebelum menginstal plugin baru untuk menghindari masalah tak terduga.
2. Periksa Dokumentasi Plugin: Baca dokumentasi plugin sebelum instalasi untuk memahami cara kerjanya dan persyaratan sistemnya.
3. Update Moodle Secara Berkala: Pastikan Moodle Anda selalu diperbarui agar kompatibel dengan plugin terbaru.
4. Gunakan Plugin Resmi: Selalu unduh plugin dari direktori resmi Moodle untuk memastikan keamanannya.
Solusi Jika Instalasi Plugin Gagal
Kadang-kadang, instalasi plugin tidak berjalan mulus. Berikut beberapa solusi umum:
- Kompatibilitas: Pastikan plugin kompatibel dengan versi Moodle Anda.
- Izin Folder: Periksa izin folder di server Anda untuk memastikan Moodle dapat mengunggah dan mengekstrak file.
- Log Error: Periksa log error di Moodle untuk mencari tahu penyebab masalah.
-
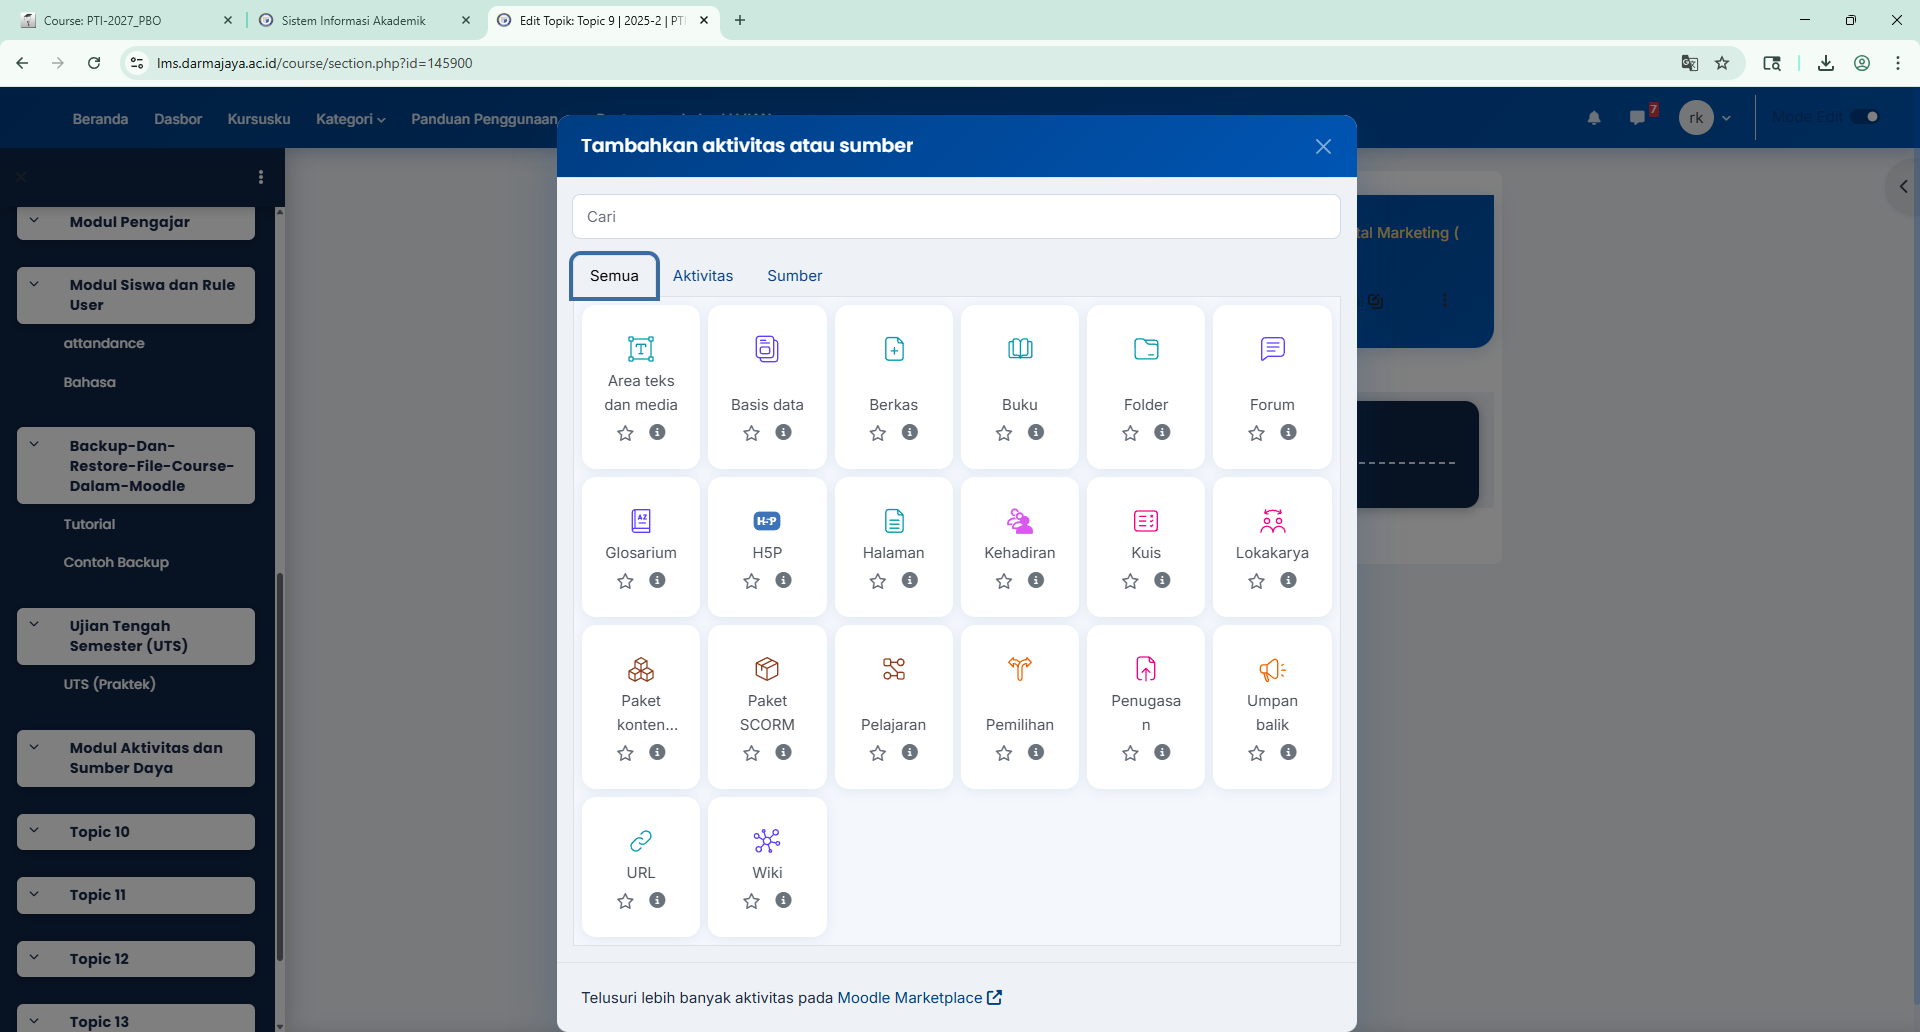
Modul pengajar Moodle mencakup pengelolaan kelas digital, pengunggahan materi, dan pembuatan aktivitas interaktif seperti tugas (assignment), kuis, dan forum diskusi. Pendidik dapat menambahkan sumber belajar (file, URL/YouTube) dan mengelola partisipan (menambahkan siswa) melalui panel kontrol yang diaktifkan dengan "edit mode".
Berikut adalah panduan ringkas penggunaan Moodle bagi pengajar:- Manajemen Kelas: Pengajar dapat membuat kelas per mata pelajaran atau per rombongan belajar. Aktifkan tombol "Edit mode" untuk mengubah tampilan, menambahkan section baru, dan materi.
- Menambahkan Sumber Materi: Pengajar dapat mengunggah file (Word, PPT, PDF) atau menyematkan URL eksternal (YouTube) di dalam kelas.
- Mengelola Partisipan (Enrollment): Klik menu "Participants", lalu "Enroll users" untuk menambahkan siswa ke kelas. Anda juga dapat membuat kode unik agar siswa masuk sendiri (self-enrollment).
- Aktivitas & Tugas (Assignment): Gunakan fitur Assignment untuk mengelola tugas. Dosen/guru dapat mengatur tanggal pengumpulan dan mengunduh hasil pekerjaan mahasiswa/siswa.
- Bank Soal & Kuis: Moodle memungkinkan pembuatan kuis interaktif dengan memanfaatkan bank soal, termasuk mengimpor soal dari format eksternal
-
In Moodle, a teacher has responsibility for the materials in their own course. They often also manage enrolments and are able to change the layout of the course page. This quick start guide introduces Moodle's features to those with the Teacher role.
Course set up
A course is a space on a Moodle site where teachers can add learning materials for their students. A teacher may have more than one course and a course may include more than one teacher and more than one group of learners. See the screencast
.By default a regular teacher can't add a new course. See Adding a new course for information on how courses may be created.
A course can display its materials in a number of ways or 'formats', for example in weekly sections or named topic sections. You can show all the sections at once or just reveal one at a time. See Course settings for more information, or watch the screencast
.Course sections may be renamed by turning on the editing and clicking the configuration icon underneath the section name. Sections may also be moved by drag and drop and sections added or removed by clicking the + or - underneath the bottom section. See Course homepage for more information.
You can also add elements, known as 'blocks', to the right, left or both sides of your central learning area, depending on your theme. For more information see Blocks.
Course enrolment
Before a learner can access your course, they must first be authenticated on the site and that is the responsibility of the site administrator.
There are several enrolment methods available to a teacher, what is available, again, depends on the site administrator. The admin might enrol students into course automatically, or the teacher might be able to let students enrol themselves. This is the Manual enrolment method. Other options can be seen in the Enrolment methods link and include Self enrolment and Guest access.
Note: Guests can only view the course and its resources; they cannot participate in any activities.An enrolment key may be set if Self enrolment is enabled so that only students with the key can enter. The screencast
gives more information on course enrolment.Grading
Every course has its own Gradebook which can record scores from assignments , quizzes , peer assessment workshops, 'branching' lessons, SCORM activities and LTI learning resources.
Other activities such as forums, databases and glossaries can have ratings enabled which will also then be reflected in the gradebook.
Grade items can be manually created from Course navigation > Grades > Gradebook setup , clicking Add on the right and selecting Add grade item. and It is also possible to import and export grades.
Tracking progress
If completion tracking has been enabled for the site and in Course navigation > Settings, you can then set completion conditions in activity settings. A button with completion requirement information will appear to the right of the activity and a student may either be allowed to check it manually, or the item will show complete once the criteria for that particular activity have been met. Completion indicators (circles) display in the course index and reflect the completion status of each activity, for quick checking.
This feature can be combined with Course completion so that when certain activities have been completed and/or grades obtained, the course itself is marked complete.
Badges can also be issued, manually or based on completion criteria to act as a motivator and record of course progress.
Restricting access
A course can be set to display everything to everyone all the time, or it can be very restrictive, displaying certain items at certain times, to certain groups or based on performance in previous tasks.
Course items and sections may be manually hidden using the 'hide' icon when the editing is turned on. If Restrict access has been enabled by the administrator then a Restrict access section will display in each course activity and resource, allowing you to choose how and when this item will be revealed, and whether to hide it completely or show it greyed out with the conditions for access.
-
-
Backing up a course
To backup a course
- Go to Administration > Course administration > Backup
- Initial settings - Select activities, blocks, filters and other items as required then click the Next button. Users with appropriate permissions, such as administrators and managers, can choose whether to include users, anonymize user information, or include user role assignments, user files, comments, user completion details, course logs and grade history in the backup.
- Schema settings - Select/deselect specific items to include in backup, then click the Next button.
- If desired, select specific types of activity to be backed up by clicking the link 'Show type options'New
- Confirmation and review - Check that everything is as required, using the Previous button if necessary, otherwise click the 'Perform backup' button
- Complete - Click the Continue button
A backup file (with distinctive .mbz extension to avoid confusion with .zip files) is then saved in the course backup area. Backup file names are of the form backup-moodle2-course-coursename-date-hour.mbz, ending in -nu.mbz when backed up with no users and -an.mbz with anonymized names.
-
-
-
-
-
The Attendance module can be added to courses in Moodle to allow teachers to collect attendance information about their students for each class session. The Attendance module works by allowing you to create multiple sessions, where each session is a class period during which you need to take attendance.
Each session has a date, a start time, and an end time associated with it. Sessions can be automatically repeated for the entirety of the course, so there is no need to create your class sessions one-by-one. The module can assign grades to students based on their attendance status, or it can be set to not require a grade. These instructions show you how to create a new Attendance module for a course with commonly-used general settings.
-
Make sure that the Attendance plugin is installed by clicking Site Administration, clicking the Plugins tab, and then clicking Manage Activities. You should see “Attendance” appear in the list if the plugin is installed.
-
Inside your course, click the Turn editing on link to enable editing.
-
In the section of your course you would like to add the Attendance module to, click the Add an activity or resource link, then select Attendance from the list.


-
If you want attendance to be worth a grade in this class, expand the Grade section of the settings page and set the Maximum grade setting to the value you want this attendance activity to have in the gradebook. If you do not want attendance to be worth a grade in this class, set Type equal to None.

-
Click the Save and display button at the bottom of the page.

-
Click the Add Session tab.

-
For this example, we will create attendance for a class session that meets Mondays, Wednesdays, and Fridays each week from 11:00 am to 12:15 pm. First, set the date for the first day the class will be offered, and set the start and end time accordingly.

-
Expand the Multiple Sessions section and click the Repeat the session above as follows checkbox. Click the Monday, Wednesday, and Friday checkboxes and select the date that the class ends for the Repeat until setting.

-
Click the Add button at the bottom of the page to create the sessions. You will be taken back to the main page of the Attendance module, which will now have a listing of all available course sessions. From this page you can click the trash can icon next to sessions you no longer need and would like to delete, and you can create new sessions by clicking the Add session tab and repeating the above steps.

-
When you are ready to take attendance for a class session, click on the triangle icon ▶ next to the session. Click the bubble under the appropriate status for each student (P = Present, L = Late, E = Excused, A = Absent), then click the Save attendance button to record the attendance. You can also do the attendance in bulk by selecting "all" from the Set status for dropdown menu and then assigning attendance in that row.

-
If you want to use a different set of statuses than the default (Present, Late, Excused, Absent), you can click on the Status set tab and change the settings there. On this page, you can also assign a point value to each status if you are using the attendance module to record grades. After making changes to this page, make sure to click the Update button to save your work.

-
-
Anda bisa memanfaatkan Module Certificate untuk membuat certificate ini. Berikut ini langkah-langkahnya :
Instalasi Module certificate
1. Download-lah plugin moodle Module Certificate di sini.
3. Extract-lah module tersebut, maka anda akan mendapatkan sebuah folder Certificate.
4. Copy-lah folder tersebut ke folder moodle/mod/certificate.
5. Selanjutnya, Loginlah sebagai Administrator.
6. Klik menu Site Administration > Notifications. Maka akan tampil module (plugin) certificate yang baru saja anda instal.
-
-
Plugins enable you to add additional features and functionality to Moodle, such as new activities, new quiz question types, new reports, integrations with other systems and many more.
-
Membuat kuis pada MoodleDocs melibatkan dua tahapan utama: mengatur kerangka kuis dan mengisi materi soal. Anda dapat memanfaatkan fitur Bank Soal atau mengimpor soal terlebih dahulu sebelum memasukkannya ke dalam kuis.
-
Mengedit Pengaturan Kuis Anda
Seperti aktivitas lainnya di Moodle, kuis memiliki pengaturan global yang menentukan aturan untuk berinteraksi dengan kuis. Aturan ini mencakup berbagai pilihan seperti batas waktu, jumlah percobaan, metode penilaian, tata letak, perilaku pertanyaan, opsi peninjauan, penundaan yang diberlakukan, umpan balik, dan pembatasan tampilan. Halaman ini menunjukkan cara menemukan dan mengedit pengaturan global ini.
Untuk mengakses pengaturan global dan mengedit kuis di Moodle, Anda harus terlebih dahulu mengklik tombol Mode Edit di pojok kanan atas. Arahkan kursor ke kuis yang ingin Anda edit. Pilih tiga titik di paling kanan kuis. Klik titik tersebut, lalu pilih Edit Pengaturan .

1. Pertama, buka tab Pengaturan Waktu . Batas Waktu: Saat membuat kuis, Anda dapat menggunakan batas waktu. Ini membatasi waktu yang dimiliki siswa untuk menyelesaikan kuis setelah mereka memulainya. Batas waktu dapat berkisar dari beberapa detik hingga beberapa hari, tergantung pada batas waktu yang ingin Anda tetapkan.

Jika seorang siswa memulai kuis dan menutupnya sebelum batas waktu habis, siswa tersebut masih dapat membuka kembali kuis dalam batas waktu tersebut dan menyelesaikan percobaan tersebut. Namun, setelah kuis ditutup, mereka tidak lagi memiliki akses ke kuis tersebut. Jika kuis ditutup atau batas waktu habis saat siswa sedang mengerjakan kuis, jawaban mereka akan dikirimkan secara otomatis meskipun mereka belum menyelesaikan kuis.
2. Jumlah Kesempatan yang Diizinkan: Anda juga dapat menyesuaikan jumlah kesempatan yang diizinkan bagi siswa untuk mengikuti kuis dengan membuka tab Nilai . Siswa dapat diizinkan satu hingga sepuluh kesempatan atau kesempatan tanpa batas. Ini berarti bahwa setelah siswa mengikuti kuis, ia dapat kembali dan mengikuti kuis berulang kali hingga mencapai jumlah kesempatan maksimum.

3. Metode Penilaian: Terdapat empat metode penilaian yang berbeda: nilai tertinggi, nilai rata-rata, percobaan pertama, dan percobaan terakhir:
Nilai Tertinggi: Moodle akan mengambil semua upaya berbeda yang dilakukan pada kuis dan menggunakan nilai mana pun yang tertinggi.
Nilai Rata-Rata: Moodle merata-ratakan semua nilai yang diterima siswa pada kuis tersebut dan itu menjadi nilai akhir kuisnya.
Percobaan pertama: Siswa hanya dinilai berdasarkan percobaan pertama mereka dalam mengerjakan kuis.
Upaya terakhir: Nilai siswa hanya didasarkan pada upaya terakhir mereka dalam mengerjakan kuis.

4. Tata Letak: Anda diberikan dua pilihan untuk tata letak kuis Anda: 1. berapa banyak pertanyaan yang Anda inginkan di setiap halaman 2. dan urutan pertanyaan yang Anda inginkan. Anda dapat menempatkan pertanyaan secara acak, di mana pertanyaan akan berubah untuk setiap siswa yang mengerjakan kuis dan untuk setiap upaya yang dilakukan siswa dalam mengerjakan kuis, atau Anda dapat mengatur kuis dalam urutan tetap. Anda juga dapat mengedit berapa banyak pertanyaan yang Anda inginkan per halaman. Ini berkisar dari satu pertanyaan hingga lima puluh pertanyaan per halaman. Opsi ini juga dapat diubah setelahnya.

5. Perilaku Pertanyaan

Moodle memungkinkan Anda mengatur kuis sehingga pertanyaan dan jawabannya berperilaku dengan berbagai cara berbeda saat siswa mengerjakan kuis. Deskripsi opsi perilaku tersebut ada di bawah ini:

Pengacakan dalam Pertanyaan: Opsi ini hanya tersedia untuk jawaban pilihan ganda. Jawaban yang mungkin akan diacak setiap kali pertanyaan diajukan.
Mode Adaptif: Jika siswa salah menjawab pertanyaan, mereka dapat langsung mencoba menjawab pertanyaan tersebut lagi tanpa harus mengulang seluruh kuis. Siswa akan dikenakan penalti dengan jumlah tertentu (misalnya 25 persen). Ini disertai dengan pilihan berikutnya, 'tanpa penalti'.
Umpan balik tertunda: Ini adalah pengaturan default. Opsi ini mengharuskan siswa untuk menjawab setiap pertanyaan dan mengirimkan seluruh kuis sebelum ada yang dinilai atau mereka mendapatkan umpan balik. Jika Anda memilih "dengan CBM", siswa dapat memasukkan tingkat kepastian mereka untuk jawaban setiap pertanyaan. Nilai kepastian mereka akan mengubah jumlah kredit atau penalti yang mereka terima untuk pertanyaan tertentu.
Umpan balik langsung: Opsi ini memungkinkan siswa untuk mendapatkan umpan balik langsung pada setiap pertanyaan saat mereka mengerjakan kuis. *Pastikan kotak "selama percobaan" dicentang untuk opsi peninjauan. Lihat di bawah. Jika Anda memilih "dengan CBM", siswa dapat memasukkan tingkat kepastian mereka untuk jawaban setiap pertanyaan. Nilai kepastian mereka akan mengubah jumlah kredit atau penalti yang mereka terima untuk pertanyaan tertentu.
Interaktif dengan beberapa kali percobaan: Saat siswa mengirimkan setiap pertanyaan, mereka menerima umpan balik langsung, dan jika mereka tidak menjawab dengan benar, mereka memiliki kesempatan lain dengan poin yang lebih sedikit.
Terapkan Penalti: Jika Anda memilih untuk menerapkan penalti, Anda memberi siswa pilihan untuk mencoba menjawab pertanyaan lagi jika mereka salah, untuk mendapatkan nilai sebagian. Opsi ini tidak tersedia dalam mode adaptif.
*Tingkat Lanjut: Setiap Upaya Berlandaskan Upaya Sebelumnya: Untuk melihat opsi ini, Anda harus memilih 'tampilkan tingkat lanjut'. Jika opsi ini diaktifkan, siswa akan dapat melihat upaya mereka sebelumnya saat mengerjakan kuis lagi.
6. Opsi Tinjauan: Bagian ini terhubung dengan pengaturan perilaku kuis dan menentukan informasi apa yang akan muncul ketika siswa meninjau upaya mereka sebelumnya dalam mengerjakan kuis (dan selama kuis dalam mode adaptif). Centang semua opsi yang ingin Anda sediakan agar siswa dapat meninjau. "Segera setelah percobaan" mengacu pada segera setelah kuis dikerjakan. "Nanti, selagi kuis masih terbuka" mengacu pada saat periode waktu untuk kuis masih terbuka tetapi kuis telah dikirimkan.

Tujuan percobaan ini adalah untuk mengetahui apakah siswa dapat meninjau kembali kuis beserta jawabannya.
Nilai: skor yang diterima siswa yang disajikan dalam format numerik.
Umpan balik spesifik: Umpan balik akan bergantung pada jawaban siswa terhadap pertanyaan tersebut.
Umpan balik umum: Umpan balik akan muncul secara otomatis, terlepas dari respons siswa terhadap pertanyaan tersebut.
Umpan balik keseluruhan: Umpan balik ini berkaitan dengan seluruh kuis. Pengaturan ini dapat dibuat di bagian lain dari formulir pengaturan.
7. Terapkan Penundaan: Anda dapat mewajibkan siswa untuk menunggu sebelum mengulang kuis setelah mereka sudah mengerjakannya sekali. Opsi ini memungkinkan Anda untuk membuat mereka menunggu mulai dari beberapa detik hingga beberapa hari.

8. Respondus LockDown Browser: Opsi tambahan adalah mewajibkan LockDown Browser agar siswa dapat mengerjakan dan meninjau kuis. LockDown Browser adalah program terpisah yang dapat diunduh dan mencegah semua aplikasi lain berjalan di komputer pengguna saat mereka mengerjakan kuis. Pilih kotak di samping opsi yang Anda inginkan agar mewajibkan LockDown Browser.
9. Umpan Balik (umpan balik batas nilai): Salah satu opsi terakhir untuk membuat kuis adalah memberikan umpan balik otomatis. Anda dapat memberikan umpan balik kepada siswa yang mendapat nilai dalam rentang nilai apa pun. Misalnya, jika Anda ingin bertemu dengan siswa yang mendapat nilai 60 persen atau kurang, Anda dapat menulis 60 persen di kotak batas nilai dan menulis di kotak umpan balik "Temui saya setelah kelas hari Senin".

10. Batasi Akses
Opsi ini memungkinkan Anda untuk membatasi akses siswa ke kuis pada tanggal tertentu. Anda juga dapat memilih untuk membuat kuis dapat diakses berdasarkan tingkatan kelas siswa.

Selanjutnya, pilih Tanggal dari opsi berikut.

-
Pilih " Mulai " dari menu tarik-turun dan atur tanggal Anda ingin mulai menyembunyikan postingan Anda.
-
Kemudian tambahkan batasan lain, dengan cara yang sama seperti sebelumnya, dan pilih Hingga dari menu tarik-turun. Tetapkan tanggal kapan Anda ingin postingan Anda tidak lagi dibatasi.


Klik "Simpan dan tampilkan" untuk memverifikasi bahwa Anda telah mengkonfigurasi semua pengaturan dengan benar.
-
-
-
Panduan ini akan memandu Anda untuk mengatur dan memberikan nilai (grade) pada aktivitas seperti tugas atau kuis di Moodle 3.3. Pelajari langkah-langkah mudah mulai dari penilaian cepat langsung di halaman tugas, hingga mengelola keseluruhan buku nilai (Gradebook) agar proses evaluasi menjadi lebih terstruktur.1. Penilaian Cepat (Quick Grading) pada TugasFitur ini sangat efisien jika Anda ingin memberikan nilai dan umpan balik langsung untuk seluruh siswa dalam satu halaman.
- Masuk ke halaman kursus Anda dan klik pada Aktivitas Tugas (Assignment) yang ingin dinilai.
- Klik tombol View/grade all submissions.
- Di bagian bawah daftar siswa, pastikan Anda mencentang kotak Quick grading.
- Anda juga bisa mengatur pengaturan halaman (site menu per page) menjadi angka yang besar agar seluruh siswa tampil dalam satu layar.
- Masukkan Nilai dan Komentar Umpan Balik langsung pada kolom yang disediakan untuk setiap siswa.
- Gulir ke bagian paling bawah halaman dan klik tombol Save all quick grading changes untuk menyimpan seluruh nilai.
2. Mengelola Buku Nilai (Gradebook)Gunakan Gradebook untuk mengatur kategori nilai, bobot, dan melihat rekapitulasi nilai akhir.- Pada menu navigasi sebelah kiri, cari dan klik menu Grades.
- Untuk menyesuaikan pengaturan nilai, buka menu drop-down di kiri atas dan pilih Gradebook setup atau Setup.
- Di halaman ini, Anda dapat menambahkan kategori baru (misalnya: Tugas, Kuis, Ujian) dengan mengklik tombol Add grade category.
- Untuk mengatur bobot nilai, centang kotak pada kolom Weight untuk masing-masing item, kemudian klik tombol Save changes.
3. Memasukkan Nilai Secara ManualJika Anda memiliki nilai dari luar Moodle (seperti ujian praktik atau kehadiran) dan ingin memasukkannya ke dalam sistem: [1]- Pastikan Anda berada di halaman Grades.
- Klik tombol Turn editing on di pojok kanan atas.
- Pada tabel nilai, cari baris nama siswa dan kolom aktivitas yang bersangkutan.
- Masukkan angka nilai ke dalam kotak input yang muncul di kolom tersebut.
- Klik Save changes di bagian bawah.
Untuk menghitung nilai akhir dengan bobot persentase di Moodle 3.3, Anda harus menggunakan metode Weighted Mean of Grades (Rata-rata Tertimbang). Sistem akan otomatis menghitung nilai total berdasarkan persentase bobot yang Anda tentukan: Kuis 30%, Tugas 40%, dan Ujian 30%.Berikut adalah panduan langkah demi langkah untuk mengatur pembobotan tersebut di Gradebook Moodle 3.3.
1. Ubah Metode Agregasi KursusLangkah pertama adalah memastikan kategori utama kursus Anda menggunakan metode perhitungan bobot.- Buka blok Navigation di sebelah kiri, lalu klik Grades.
- Pada menu drop-down di kiri atas halaman, pilih opsi Gradebook setup.
- Cari baris paling atas (baris yang merupakan nama kursus Anda). Pada kolom Actions, klik Edit, lalu pilih Edit settings.
- Pada bagian Grade category, ubah menu Aggregation menjadi Weighted mean of grades.
- Gulir ke bawah dan klik tombol Save changes.
2. Buat Kategori Nilai BaruAnda perlu membuat tiga kategori terpisah untuk mengelompokkan setiap aktivitas.- Di halaman Gradebook setup, gulir ke bawah lalu klik tombol Add grade category.
- Pada kolom Category name, ketik
Kuis. - Klik tombol Save changes.
- Ulangi langkah di atas untuk membuat kategori
Tugasdan kategoriUjian.
3. Masukkan Persentase Bobot NilaiSetelah kategori dibuat, kotak input bobot (Weight) akan muncul di samping nama kategori.- Centang kotak kecil di sebelah kolom Weight untuk masing-masing kategori baru Anda.
- Masukkan angka bobot sesuai rencana Anda:
- Pastikan total penjumlahan bobot tersebut adalah 100 (30 + 40 + 30 = 100).
- Klik tombol Save changes di bagian bawah halaman untuk mengunci pengaturan bobot.
4. Pindahkan Aktivitas ke Dalam KategoriSekarang, Anda harus memasukkan kuis, tugas, atau ujian yang sudah ada ke dalam kategori yang sesuai.- Pada halaman Gradebook setup, lihat daftar aktivitas Anda yang masih berada di luar kategori.
- Centang kotak di kolom Select (paling kanan) pada aktivitas yang ingin dipindahkan.
- Gulir ke bagian paling bawah halaman, pada menu drop-down Move selected items to, pilih kategori tujuan (misalnya memilih kategori
Kuisuntuk aktivitas Kuis 1). - Sistem akan otomatis memindahkan aktivitas tersebut ke dalam kelompoknya.
Catatan: Saat Anda membuat aktivitas kuis atau tugas baru di masa mendatang, Anda bisa langsung menentukan kategorinya pada menu pengaturan aktivitas tersebut di bagian Grade > Grade category.
✅ Rumus Perhitungan Akhir MoodleMoodle akan menghitung nilai akhir siswa menggunakan rumus matematika berikut:\(\text{Nilai\ Akhir}=(\text{Rata-rata\ Kuis}\times 0.3)+(\text{Rata-rata\ Tugas}\times 0.4)+(\text{Rata-rata\ Ujian}\times 0.3)\)